1. Download and Install the Plugin
Step 1:- Install WiserReview plugin in WooCommerce ( Install, API key, Enable mode)
-
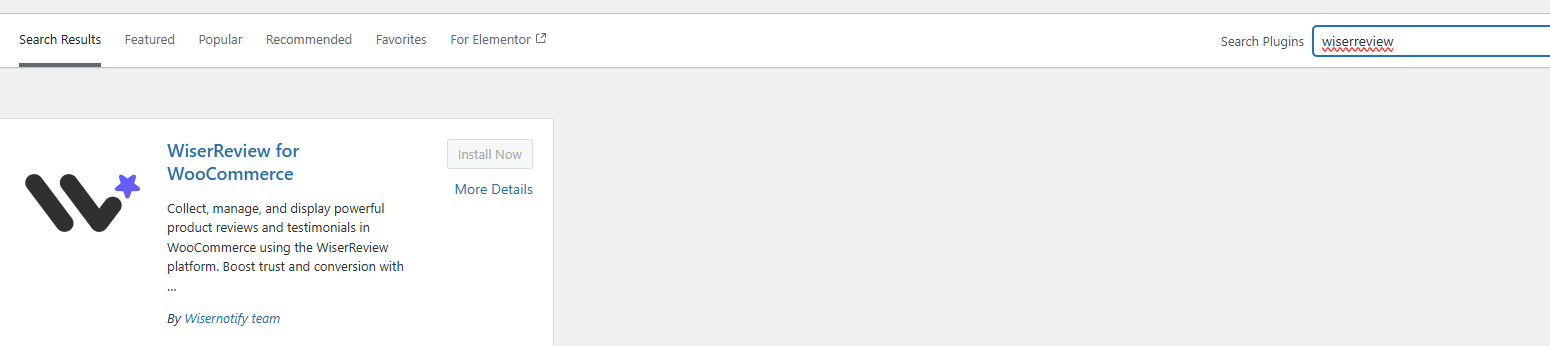
In your WordPress Admin, go to Plugins > Add New > Upload Plugin.
Or search “WiserReview” in the plugin search box
-
WiserReview WooCommerce plugin, install, and click Activate Plugin
-
You’ll now see WiserReview in your left-hand admin menu — click it to open the settings.
Step 2: Connect Your WiserReview Account
-
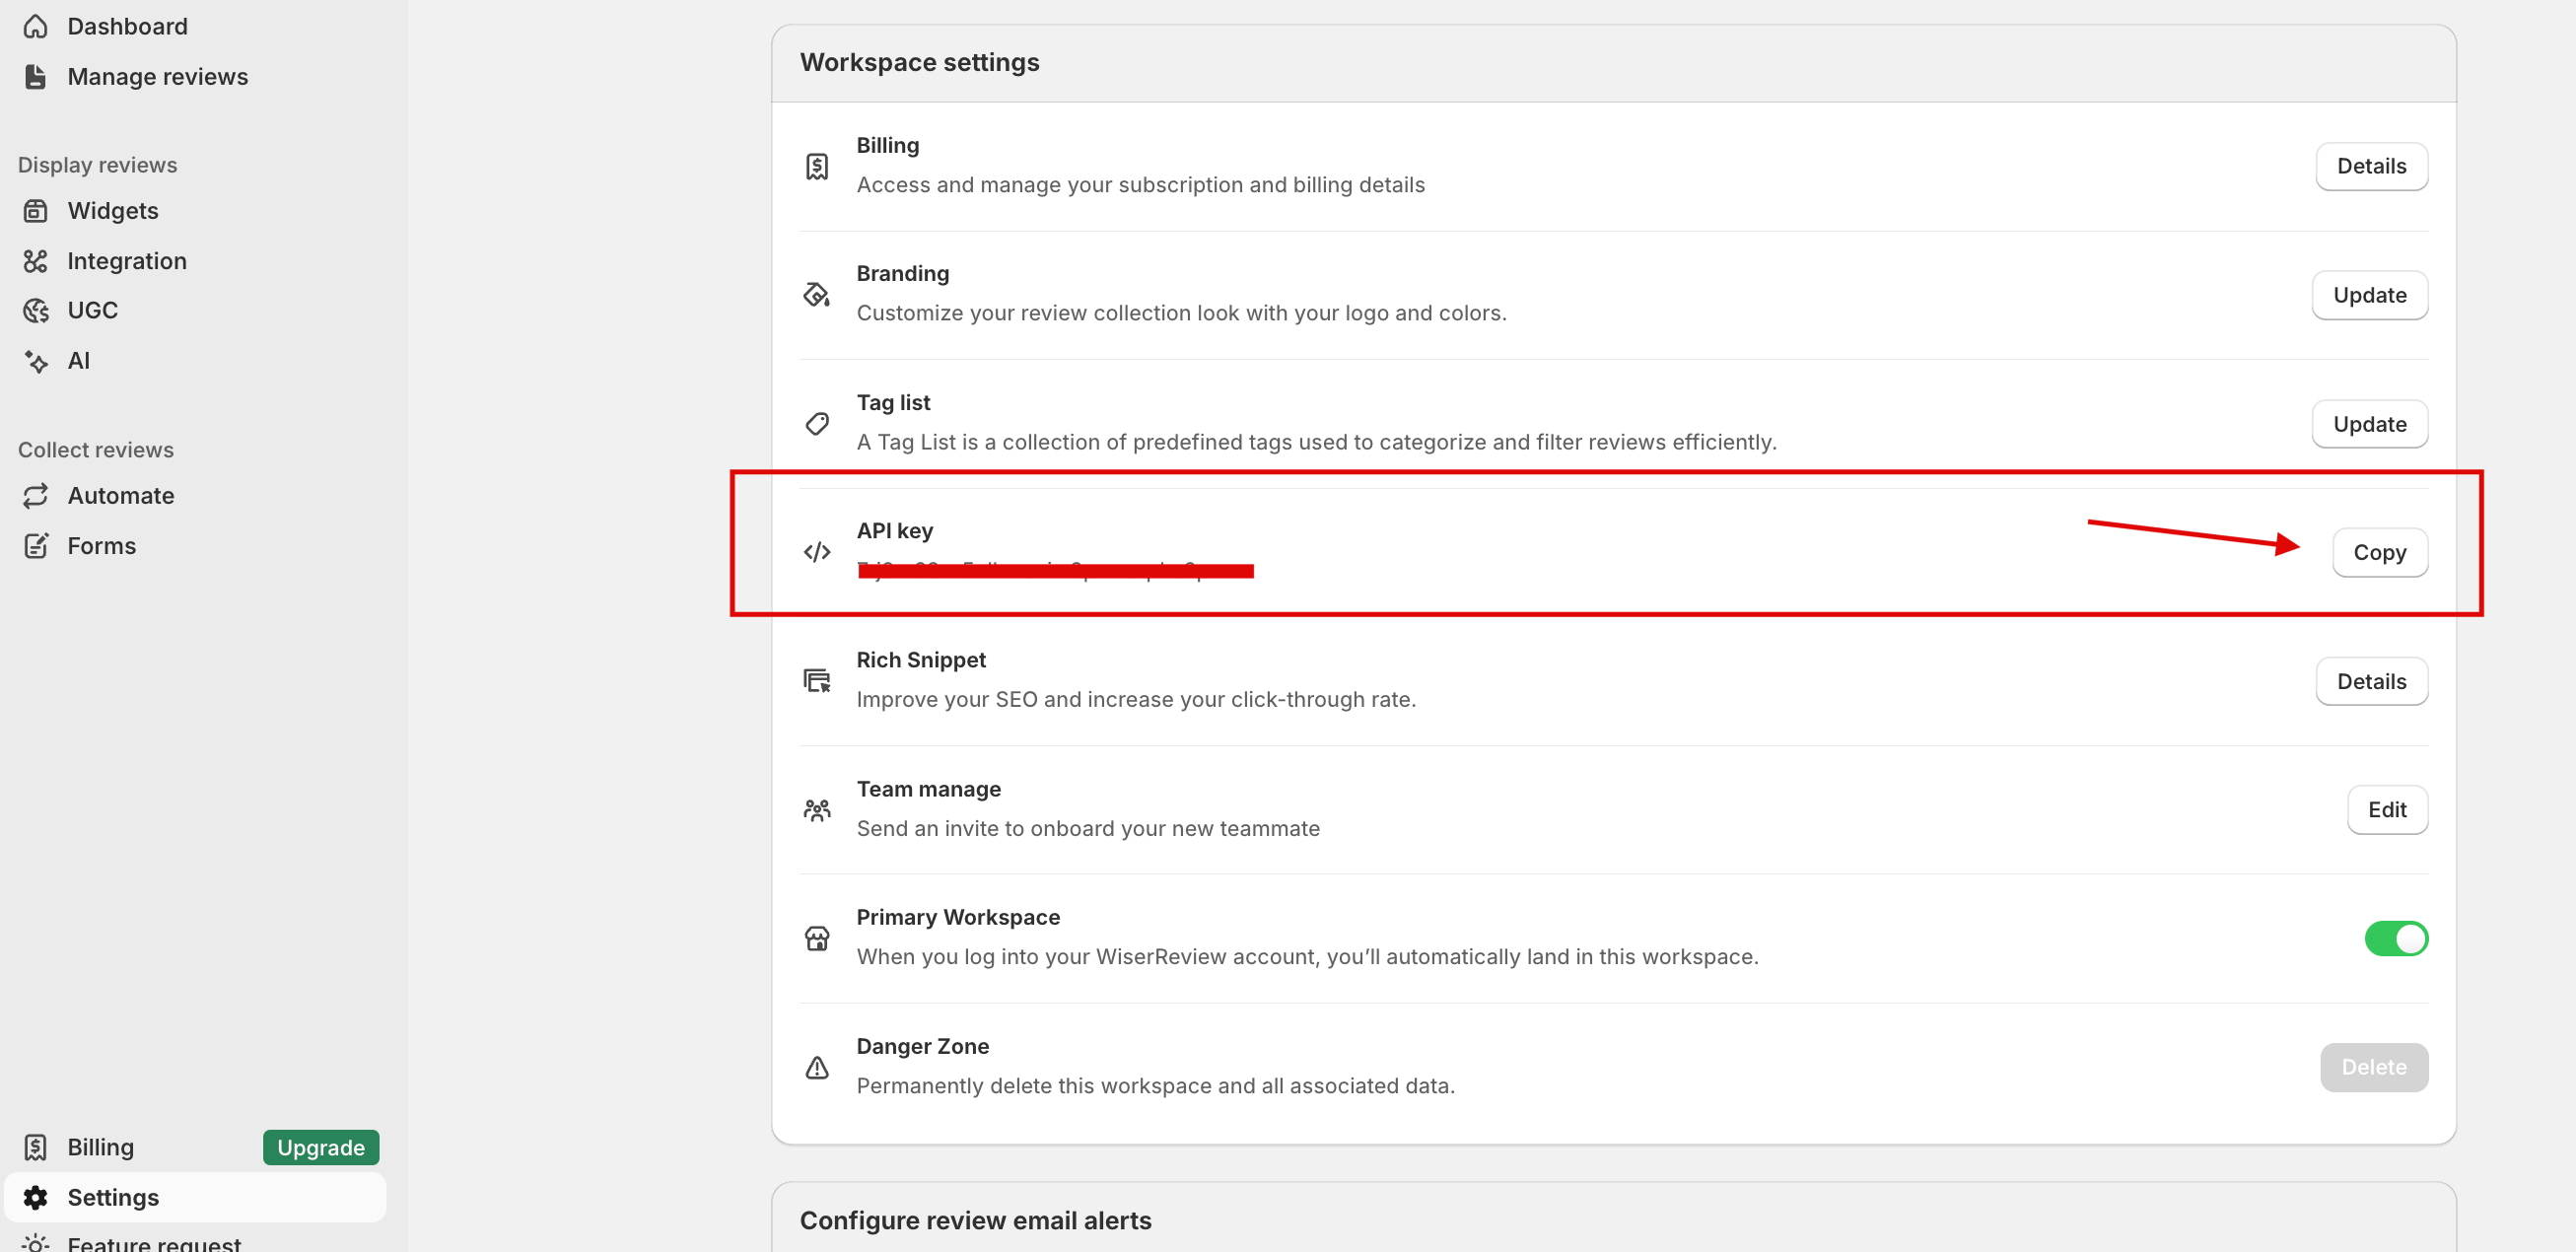
Log in to your WiserReview account.
-
Go to Workspace Settings and copy your API Key.
-
Paste the API key into the WiserReview plugin settings in WordPress.
-
The plugin will automatically validate your key.
Note: Once the key is valid, widget toggles and display settings become active.
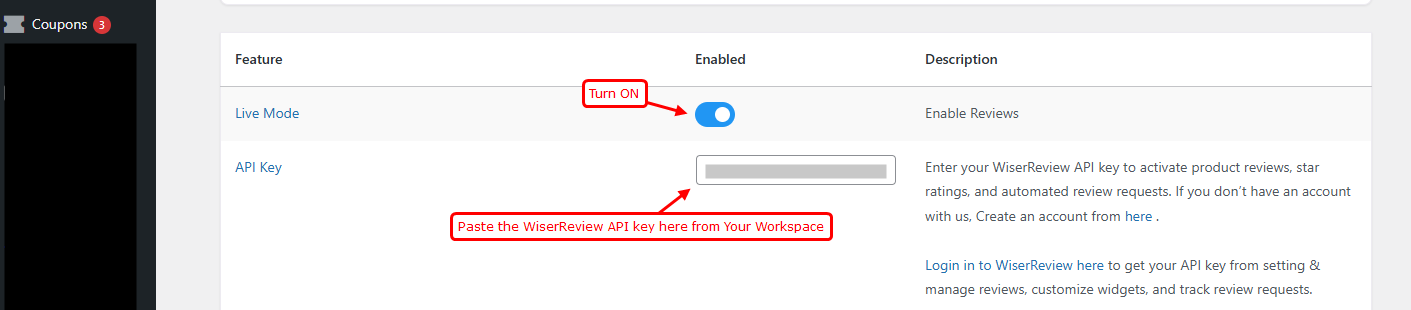
Step 3: Enable Live Mode
-
Toggle Live Mode
Enabledinside the plugin settings. -
This activates the review widgets on your live store.
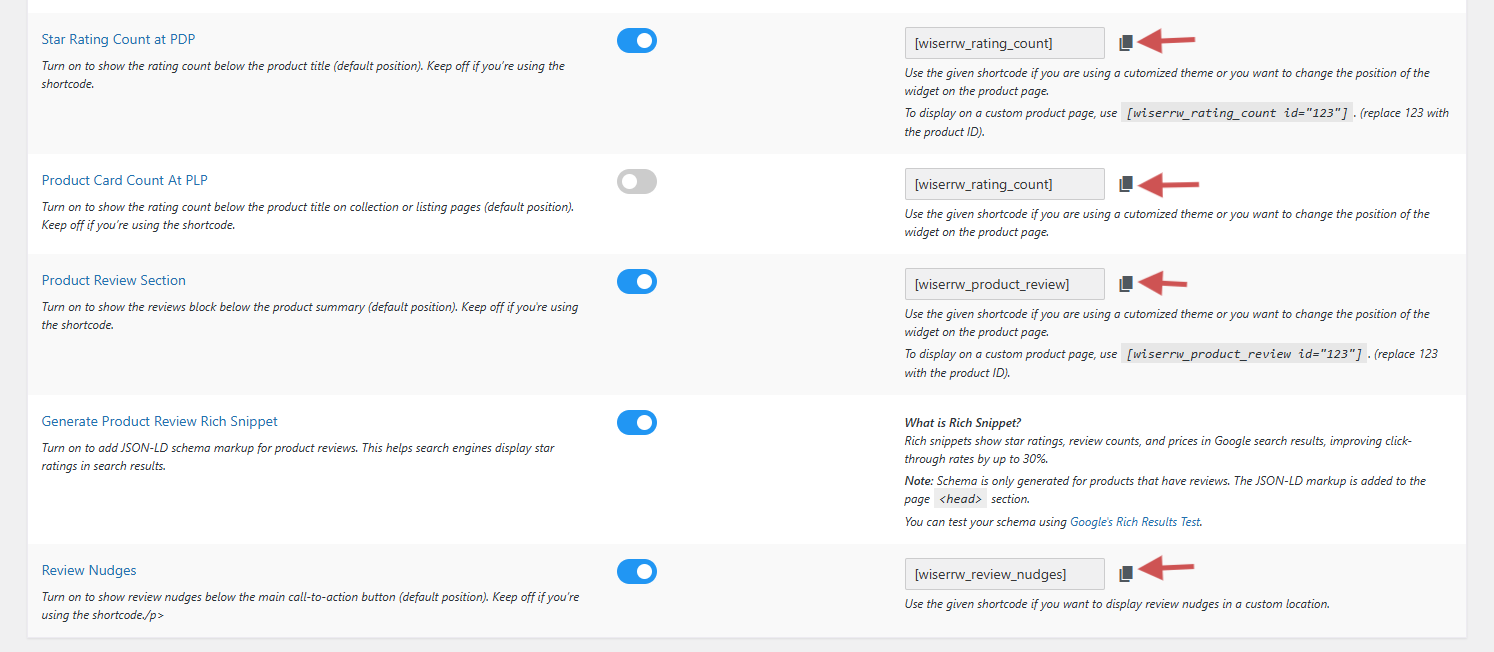
2. Display widgets( Short-codes)
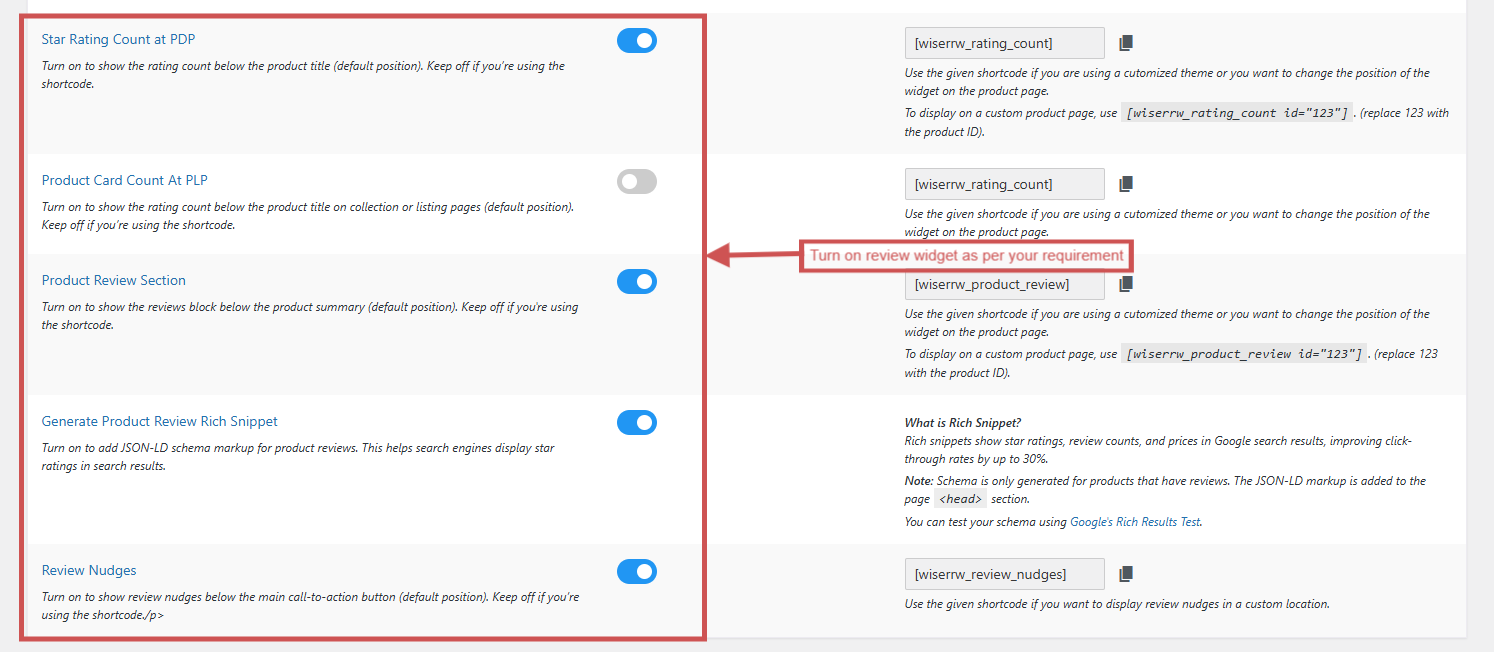
Step 1: Switch on the widgets you want, such as:
-
-
Star Rating Count on Product Page (PDP)
-
Star Rating Count on Collection Page (PLP)
-
Product Review Section
-
Review Nudges
- Generate Product Review Rich Snippet
-
-
Click Save Changes after enabling.
| Toggle | What It Controls |
|---|---|
| Star rating count at PDP | Shows average star rating count on the Product Page. |
| Product rating count at PLP | Displays the number of stars on product cards in Shop/Category pages. |
| Product review section | Enables full product review section with text + images on product pages. |
| Review nudges | Shows your best reviews just below the buy now button or add to cart button |
| Generate Product Review Rich Snippet | Adds JSON-LD schema markup for product reviews, helping search engines display star ratings in search results. |
Step 2: Using Shortcodes (For Custom Themes or Still Widgets are not displaying)
-
If you are using a custom theme or the widget is not appearing, use the provided shortcode.
-
Copy the shortcode and place it in your page builder where you want the widget to appear.
-
Ensure you add the shortcode in the correct location so it renders properly.
Clear Cache
-
Clear your server-side cache, browser cache, or purge any active cache plugin.
-
Visit your collection or product detail page to check if the review widget is showing.
-
The widget will display only if product reviews are available in WiserReview.
Step 3: Preview on Your Store
-
Visit any product page to check:
-
Star ratings near product titles
-
The reviews section loaded properly
-
Nudges showing for products with reviews
-
-
Test collection or form submission if you’ve enabled automated review requests.
You’re all set!
Customize WiserReview Widget Design and Settings
- Log in to WiserReview Deshboard Then
Use the left panel to:
- Adjust color, layout, and card style
- Filter reviews by tag, rating, or verification
- Add optional Custom CSS for advanced styling
Use the Preview area on the right to see changes live.
Note: If you use the native WooCommerce review plugin, turn it off.
Go to WooCommerce > Settings > Products in WordPress, scroll to Reviews, and uncheck Enable product reviews
3. Import Reviews from Existing Platforms
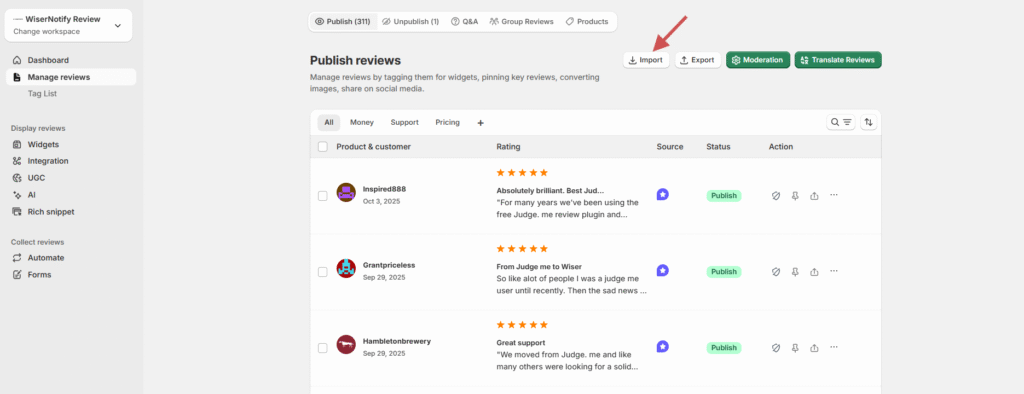
If you already have reviews from platforms like Judge.me, you can import them into WiserReview.
Steps:
-
Go to Manage Reviews → Import Reviews.
-
Select the source platform (e.g., Judge.me).
-
Upload your review CSV file.
-
Map columns and confirm import.
Detailed guide: Import reviews from other platforms
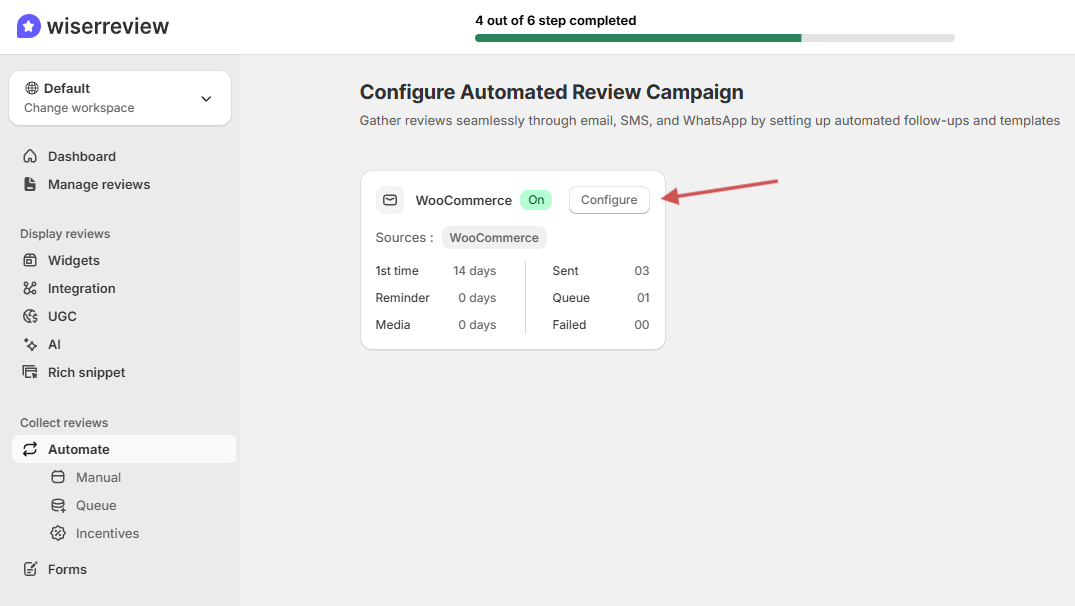
4. Automation Campaign
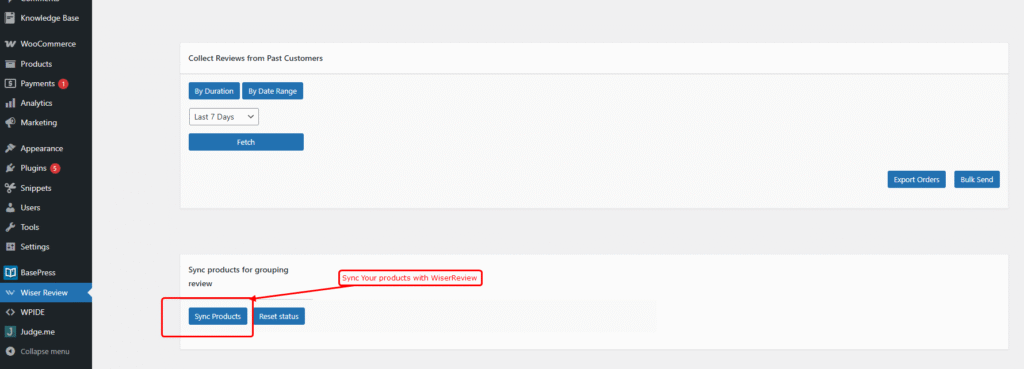
5. Group Product Reviews in WiserReview
Follow these steps to sync products in WordPress and group their reviews in your WiserReview account.

6. Integrate with Google Shopping
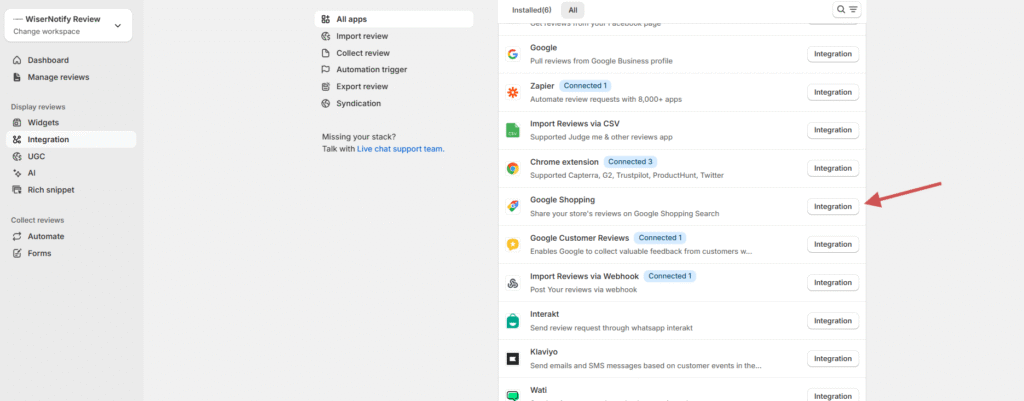
Connect your WiserReview account with Google Shopping to display product ratings in search results.
Steps:
-
Go to Integrations → Google Shopping.
-
Click Integration.
-
Generate the Review Feed XML.
-
Add the feed URL to your Google Merchant Center account.
Detailed guide: Connect WiserReview with Google Shopping
7. Multi-Workspace Review Sync
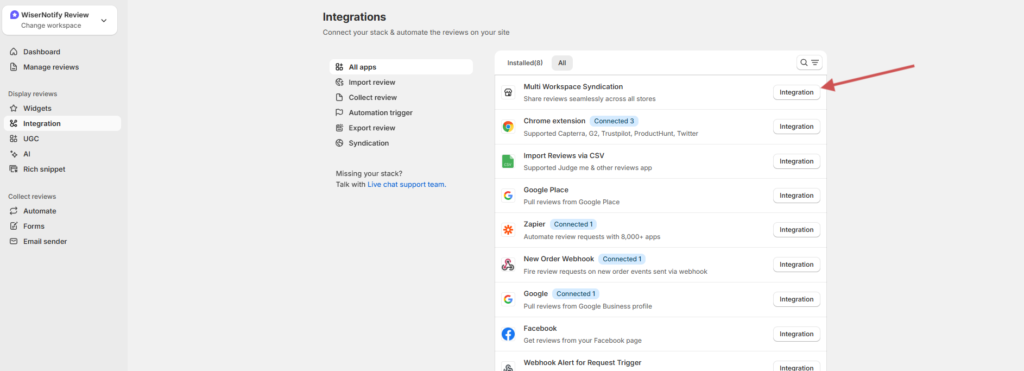
Sync reviews across multiple stores that share the same products or SKUs.
Steps:
-
Go to Integrations → Multi-Workspace Sync
-
Connect your additional stores.
-
Verify matching SKUs.
-
Enable review sync automation.
Detailed guide: Multi-Workspace Review Sync